Saturday, May 16, 2015

USA Letter Set Tutorial

The large USA is one of my favorite projects.  I hope this tutorial will assist you in making this fun and patriotic project for your home.

1.  Remove plastic wrap around letter set, and dust the wood off with a foam brush.

2.  If applying paper to your project, trace your letter onto the paper and cut each out.
3.  After paper is traced and cut out, you are ready to apply stain, or paint.
 

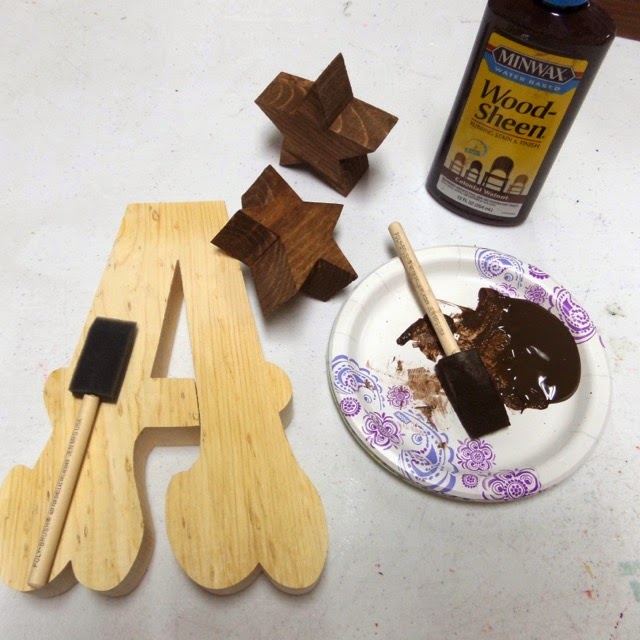
4,  After paint or stain are dry, squirt a small amount of wood glue onto a paper plate, and spread a thin coat of glue on each piece of wood. 

5.  Lay paper onto letter with glue spread on it and use your vinyl applicator, or credit card to push any bubbles or excess glue to the edge of piece of wood.  Glue will dry clear if you happen to miss a little.

6.  Let wood with paper sit for 10-15 minutes, then, using either a sanding block, or a rolled piece of sand paper, in a downward movement sand excess paper until paper and wood are flush.
7.  Once paper and wood are flush you are done.  If, you wish to apply a coat of Texturizing Cream, which will seal your paper/wood, making it feel and look like a canvas, and in my opinion, just a more finished look.  It seals your paper to where you are safe to hang it on a door that is exposed to the outdoors.
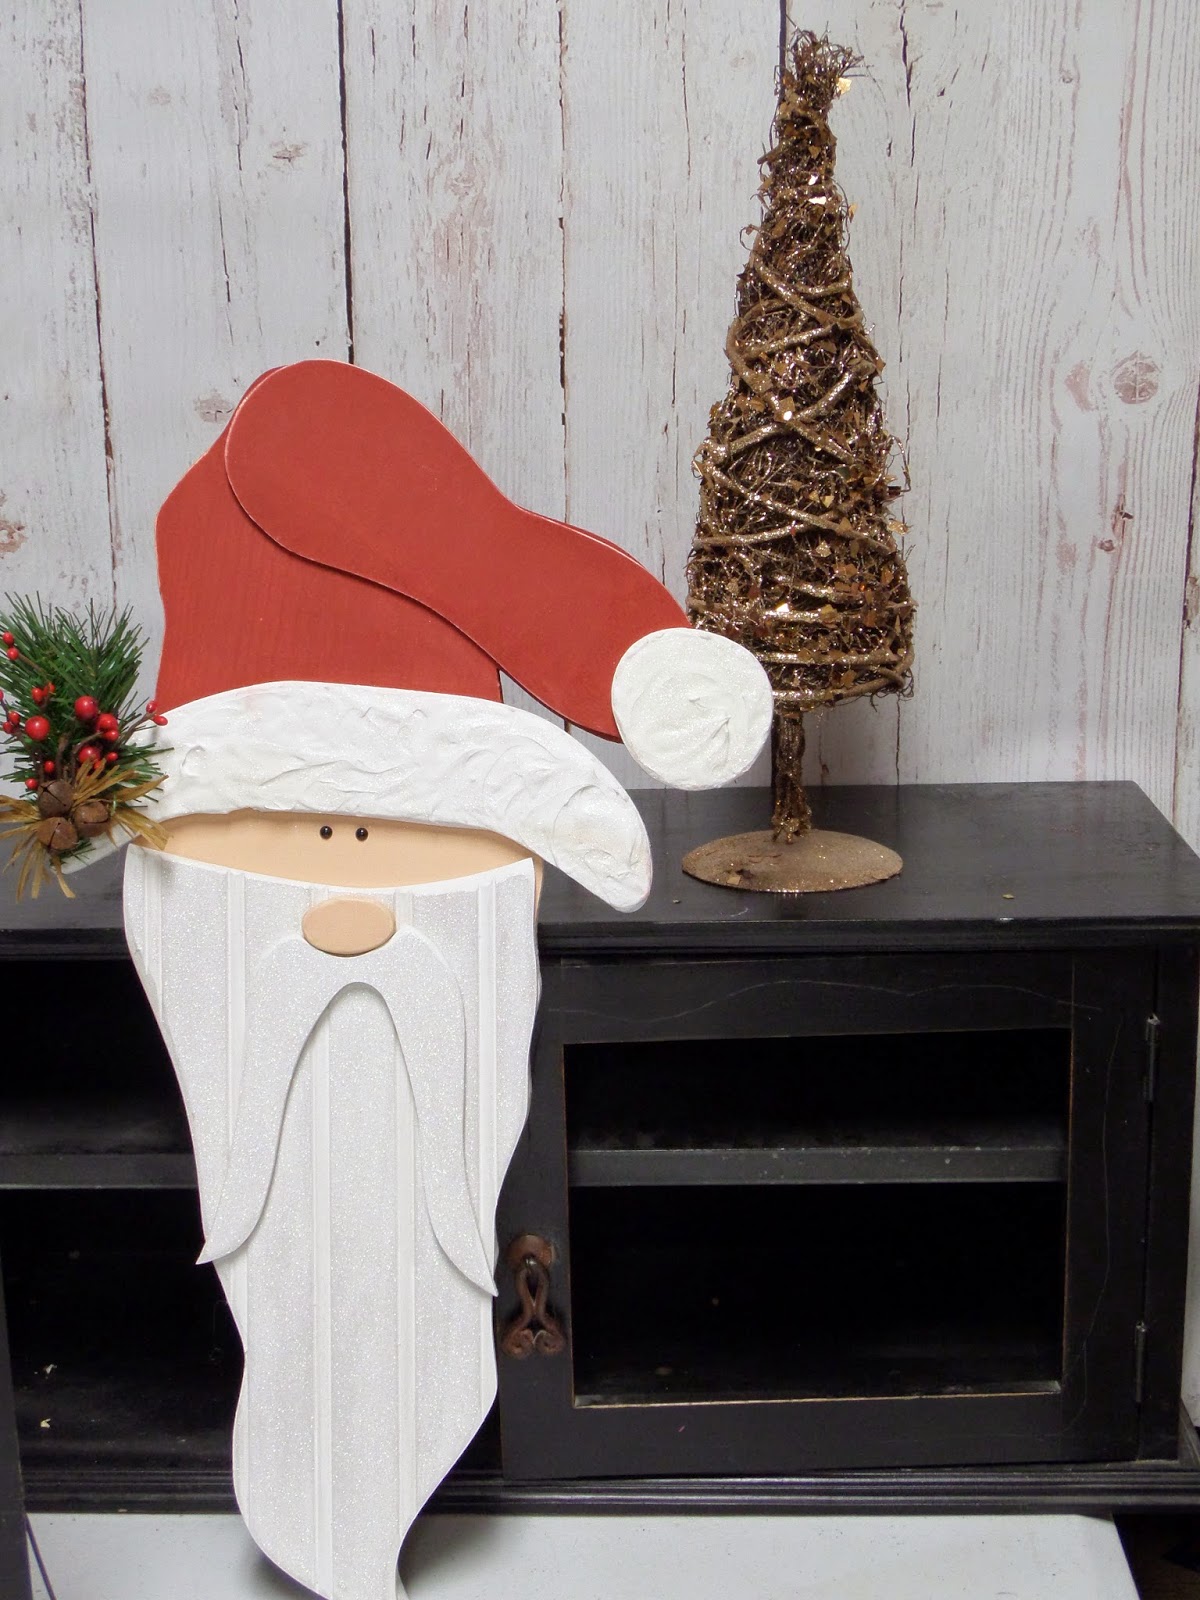
8.  Embellish your project however you would like.  My example here is with some jute.
9.   You are ready to display your project.


Tutorial By
Nancee Peterson
Owner of The Wood Station

Friday, November 21, 2014

Snowman Door Hang Class

Snowman Door Hang Class
Wednesday, November 10th - 6:30pm.
at The Wood Station
 
  
 Cost of class is $27.00 that includes product, supplies and instruction!

When you leave the class he will be complete and ready to hang on your door.
Enrollment limited.

Reserve your spot by calling or stopping by The Wood Station.
785-3700

Friday, November 14, 2014

Christmas 2014

All this amazing Snow is getting us really excited here at The Wood Station!
 
 
It is that wonderful time of the year that we start preparing for the Christmas Season!
 
At The Wood Station we have so many beautiful projects to really bring that Holiday Spirit into your home!
 
And don't forget all those fun projects you can do to give as the perfect gift or a great way to bring those you love together for a fun night of crafting!


Tuesday, November 11, 2014

Turkey Roundup

Here at The Wood Station we are having a
 
TURKEY ROUNDUP
 
Get your Turkey Door Hang and
Turkey Place Card Holders for 25% Off!!
 
 
Wednesday until Saturday is your chance to gobble them up!!

Thursday, November 6, 2014

FA LA LA Letter Set Tutorial by Taylor Peterson

 
FA LA LA LETTER SET
Tutorial 

Who else is ready for Christmas? Doing this Christmas Fa La La letter set sure got me into the Christmas spirit! There are so many fun and adorable things to make for your home for the holidays at The Wood Station. From letter sets to Door hangs, you can find just about anything in their store. And their paper selection is awesome – I had a hard time choosing which papers to use!
 
 
First, start off by prepping your wood. Wipe off any excess saw dust from your project and sand down any rough edges. Make sure you get as much excess saw dust off as you can, so the paint and paper will stick better to the wood.


Time to pick your paper and trace out your letters. I always mark the front of my letter with a pen or pencil. Even though the [A]’s and the [L]’s are the same letter, they are each hand cut so they all have a little bit of their own character… So I marked each of them with the paper color/design that I traced the letter on, just to make sure I got the correct one. When tracing your letter, lay it face down on the back side of the paper you are going to use. Cut out and set aside.
 
 
When painting wood that you are going to be using paper on, only paint the back, sides and the very edges of the front. Paper will sick better to unpainted wood. You can paint/stain the letters all one color, or using coordinating colors to match your paper. Make sure you paint the entire bottom block that the vinyl will go on.
 
 
When gluing paper onto wood, ALWAYS use wood glue! {Purchased at The Wood Station} I have projects from last year and the paper still looks awesome! Before using wood glue, I used Modge Podge and anything I used that on has lifted/bubbled. Use a thin layer of glue spread on the entire letter and put on your paper, making sure to push out any air bubbles getting the paper nice and smooth. Once dry, sand off any excess paper – making sure to sand downward as to not pull the paper back off. 
 
 
At this point, be creative! If you want to distress it – go for it! The Wood Station has anything and everything you will need to complete your project. Embellishments, ribbon, wire, etc. The fun thing about all of their projects is that they have everything to make them your own.


Happy Crafting!

*Make sure once you finish all those Christmas projects you upload pictures to
The Wood Station Facebook page! 
 
Pin It 
 

Tutorial by Taylor Peterson