What Would Michelle Do?
 I love it when things coordinate! I like to tie the crafts that I do for each season together so that they all coordinate. I like to use colors, papers, embellishments and techniques to do so. The crafts are all different with their own character but, they all tie together. I am going to show you how I did that with three of the Valentines projects from The Wood Station. This time you are going to get a bonus tutorial! I will be posting tutorials for two projects. A Be Mine banner tutorial and an I love U letter set. Here are the three projects that I tied together.
When making the hugs and the I love U, I used a lot of the same techniques with the distressing of the papers. I decided to make a banner to tie the two together more. For the banner I used all of the same papers that I used in the other two projects. I also used the same techniques and the same embellishments.
First I will show you how I made the I love U.
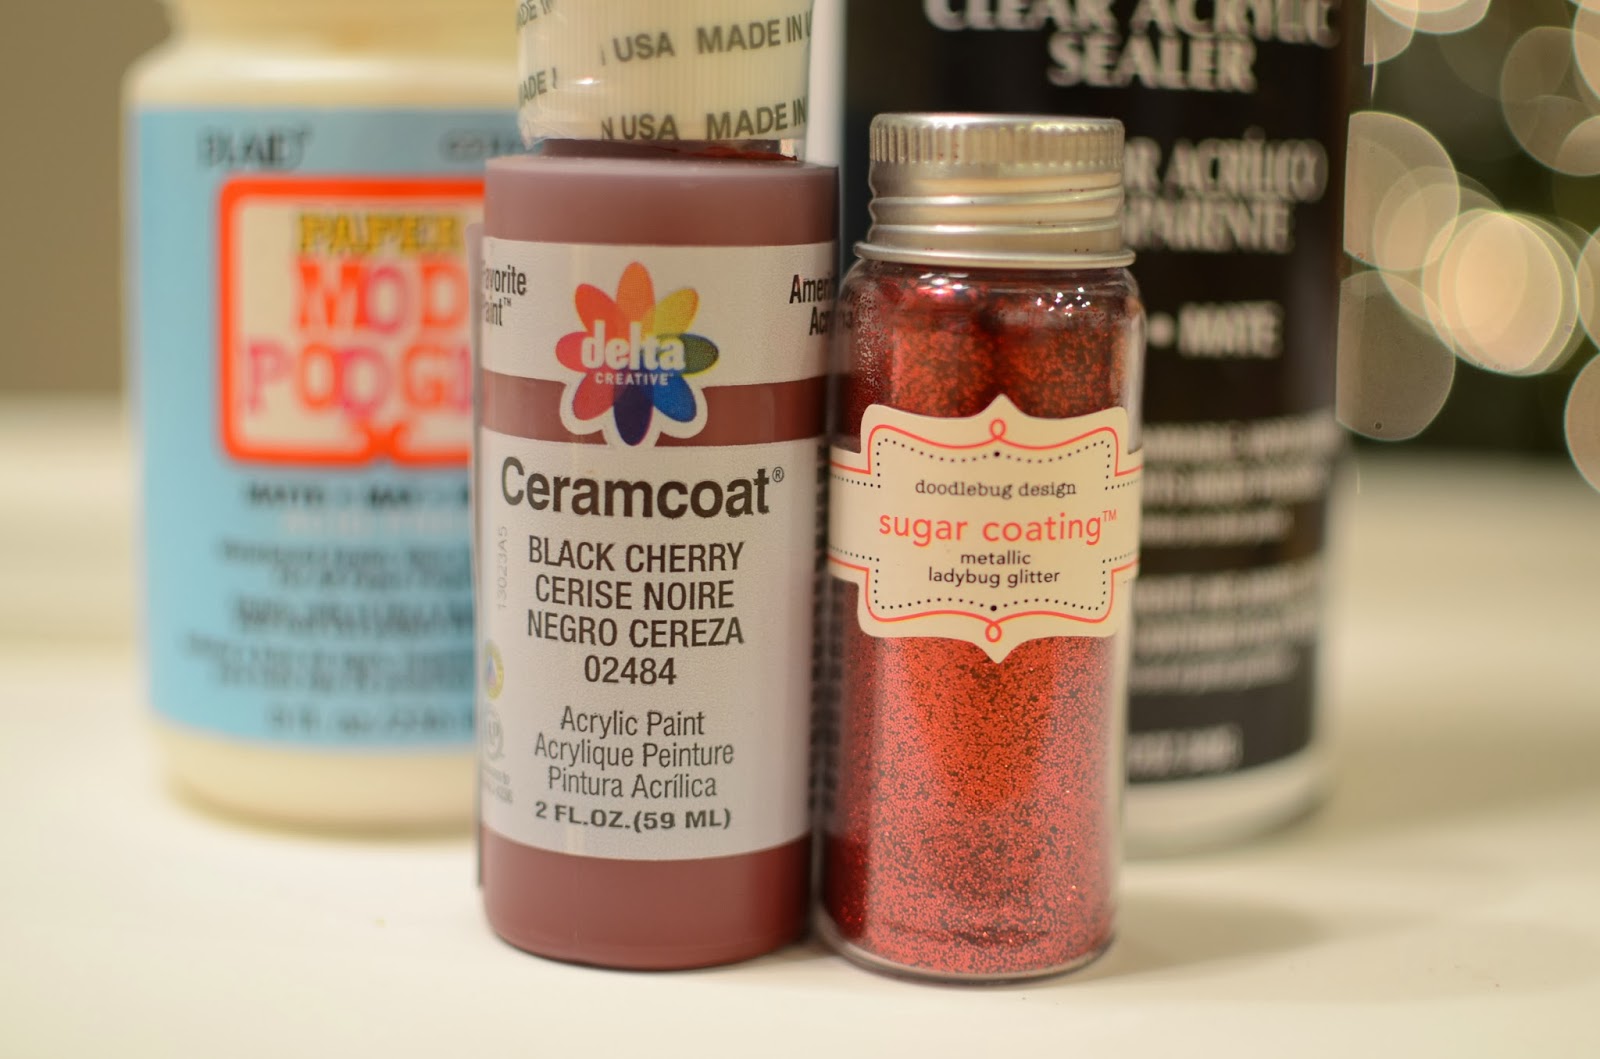
Here is a list of products that I used: Minwax dark mahogany stain, Delta white paint, Doodlebug white glitter, Dorice wood glue, Red wire, small metal key, Colorbox dark brown ink, Papers by My Minds Eye Cupids Arrow NO.14 Cheveron and Confetti Heart, spray sealant, large clear sticky rhinestones and sheer brown stitched ribbon. The tools you will need are: two foam bruhes, sandpaper, Colorbox inking tool, wire cutters, the inside of a pen, and scissors.
When you take the wood out of the package it will still have sawdust on it. You will need to prepare the wood by removing the excess dust. I like mine to be very smooth so I sand all of the pieces to remove any rough areas.
I only covered two pieced with paper. The easiest way to cut paper to cover the wood is to pace the piece face down on the back side of the sheet of paper. Use the inside of a pen to trace around the entire piece. Tip: If you take the inside out of a pen it is much easier to trace around the small areas of the piece. Trace all your pieces and set the paper aside. This will make your project more time efficient.
Using a foam brush apply the stain to the back and sides of all the pieces. I stained all of the sides of the center heart. One of the things that I love about stain is that it goes on so quickly. It is much faster than painting.
While the stain is drying cut the paper that was traced before staining.
To create texture and depth you can distress the paper. I did this by wadding and inking the papers. So the next step is to wad the paper up into a ball and unfold it. The more distressed you would like it the more crinkles it will need to have. Play with the paper until it looks the way that you want it.
Then using a colorbox inking tool to apply dark brown ink to the creased parts of the paper. Start out lightly, you can always add more ink but you can’t take it off. Ink until you have the look that you want.
Once the stain is dry apply an even layer wood glue to the front of the wood piece using a foam brush. You do not want the glue to be too thick or too thin or you will have issues. Set the paper covered pieces aside to dry. I always place mine face down to help the paper adhere.
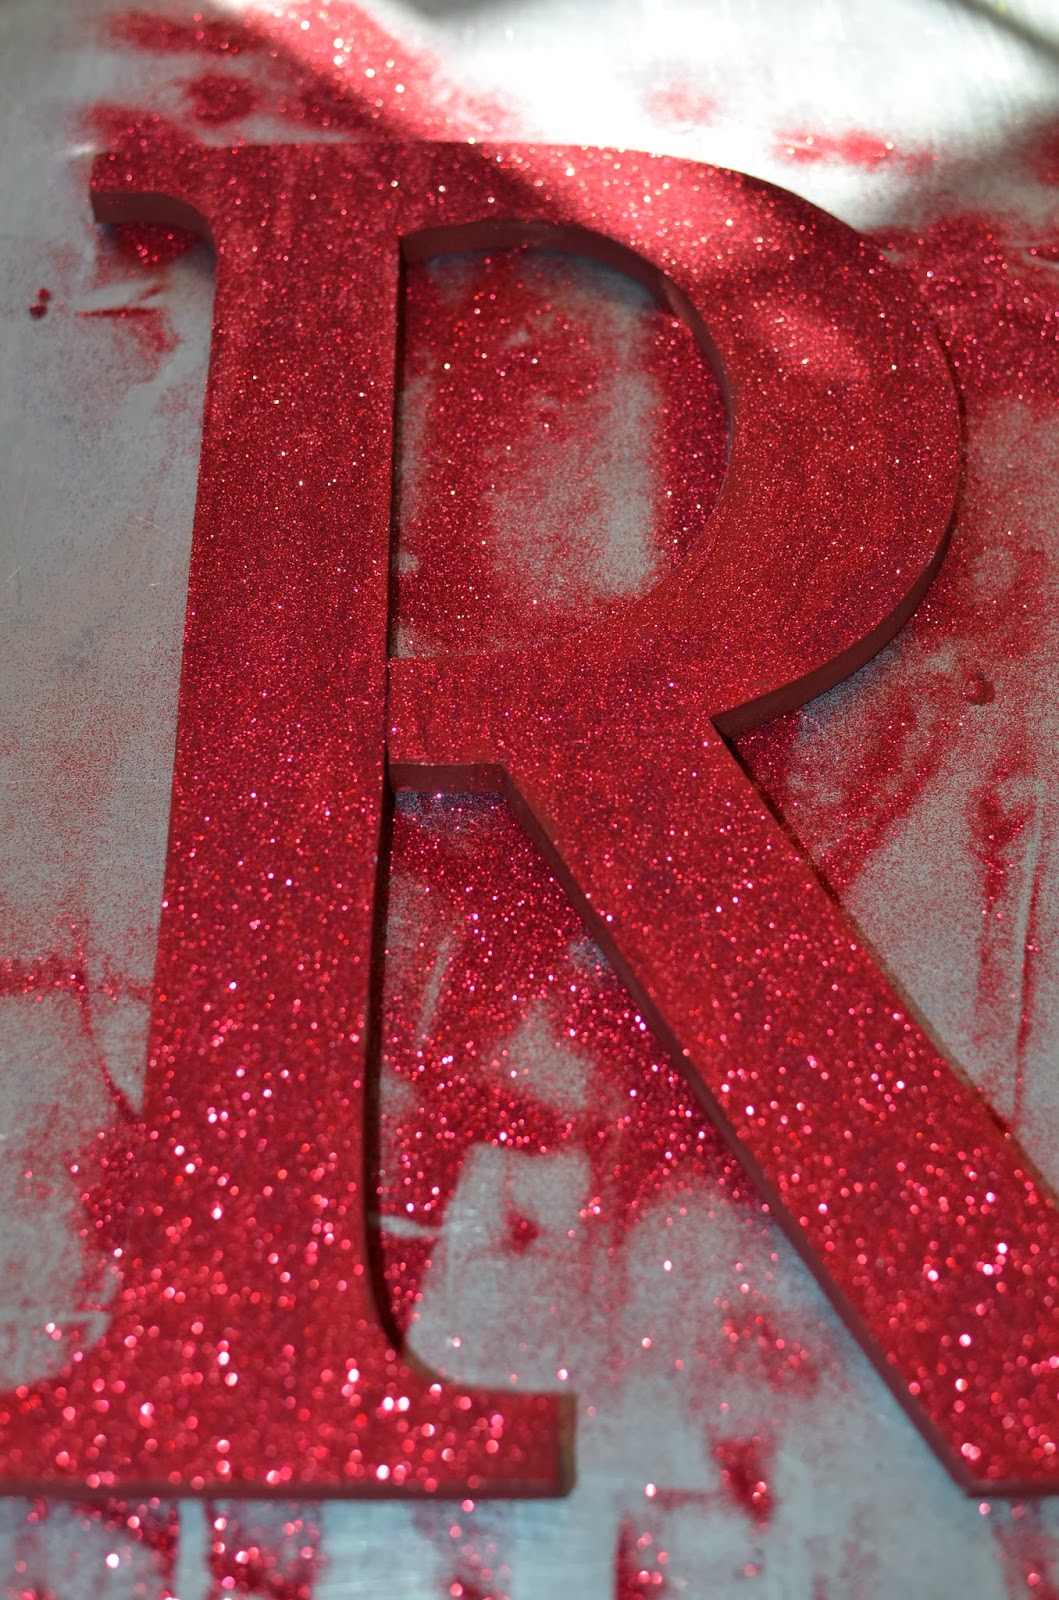
Next apply the glitter to the dot of the I and the outside piece of the heart by applying a good layer of wood glue using a foam brush. Make sure that the layer is even or you will be able to see streaks in the glitter. Place the piece over a sheet
of paper. Cover completely with glitter. Let it set for a minute and then dump the excess glitter onto the paper and return the glitter to the bottle. Repeat with the next piece. Set aside to dry. Then spray the glitter with a sealant. This will keep the glitter from falling off everywhere.
Once all the pieces are dry sand the edges and apply dark brown ink to all of the edges. After that apply the embellishments.

Cut a piece of red wire the size that you would like it, make sure that you leave plenty of length to curl it the way that you want it. Press the center of the wire around the back of the I in the location that you would like it. Twist it one or two times in the front to hold it in place where you want it. Place the small metal key on the wire and twist once or twice to hold the key in place. Then using the wood end of a foam bush or a pencil curl the ends of the wire around it as many times as you like. Then bend or stretch the wire to get your desired look. Place the dot into the top of the I.
Place three medium size rhinestones off of a large set of rhinestones onto the lower right side of the U. Place the center of the heart into the outside piece that you glittered. Tie the sheer brown stitched ribbon into a bow around the left side of the heart. Then it is finished!
What Would Michelle Do? - Be Mine
The second tutorial is the project that I did to tie the other two together.
Be Mine banner.
This turned out to be a really fun project for me. It was like starting with a blank canvas. There is something gratifying in releasing your mind and creating something. A special thanks to Nancee for the idea of using the hearts on the ends. My goal was to tie together the two Valentine projects that I had already done. So I decided to use all six of the papers that I had already used and add a paper. I used the four papers from hugs and the two papers from I love U. I also used some of the same techniques and embellishments from each of the previous projects.
Here is a list of products that I used: two slat board hearts, 3 top note banner pieces, 3 pendant banner pieces, Minwax mahogany stain, Delta black cherry paint,
Darice wood glue, texture cream, spray sealant, red wire, Doodlebug red glitter, Doodlebug white glitter, Colorbox dark brown ink, 5 small metal keys, small black striped ribbon, black sheer stitched ribbon, white sheer stitched ribbon, black stitched ribbon, black polka dot ribbon, black sprinkles, small rhinestones from the larger set of rhinestones, small wood heart, Papers by My Minds Eye Cupids Arrow NO.14 Cheveron and Confetti Heart, Lost and Found Record It! Heirloom Adores, Papers by echo park Head Over Heels Just Love You, Papers by Fancy Pants Designs BE.LOVED. Old Flame, BE.LOVED. Love Letter, BE.LOVED. Adoration. Tools I used: 2 foam brush, scissors, sand paper, wire cutters, Colorbox inking tool, a drill with a small bit.

Label the front of all of the wood pieces as the front and which letter it is. All of the pieces are slightly different; therefore you will have to match each piece to the paper that you traced it on. You will also need to trace each individual piece. Trace all of your papers and set them aside.
Make sure that the wood is free of saw dust. Use a foam brush to apply the stain to the sides and back of all banner pieces. This will go very quickly. Set aside to dry. Paint the small wood heart with the black cherry paint and set aside to dry.
Cut out the shapes the traced shapes while the stain dries.
To add texture and depth wad up all of the papers and unwed them until you have the amount of crinkles that you like. Be careful when wadding papers with glitter. Take your time and only the parts of paper that do not have glitter on them. Spray the glittered areas with a sealant. This will help the glitter stay in place. Sand the papers using a piece of sand paper to achieve the desired look.
Apply an even layer of glue to the wood piece then adhere the paper that was cut out for that piece. Set the piece aside face down to dry. Repeat this process until all of the paper has been glued on. When the pieces have dried sand all of the edges. Use a Colorbox ink applicator to apply ink to the papers on all of the edges and the crinkled and sanded areas. Start out light on the ink, you can apply more but you cannot remove it. Ink until you achieve the desired look.
Using a sponge apply texture cream to each piece. While the texture cream is still wet using your fingers lightly pinch and sprinkle with white glitter. Pus n even layer of wood glue on the small wood heart and cover it with red glitter. Set aside to dry. When dry spray with sealant.

Drill two holes in each of the hearts; one on each side to attach the pieces and hang the banner. Turn the banner pieced and poke a sharp object thru the holes to pierce thru the paper. Cut nine pieces of red wire 13 inches long using wire cutters. Curl one end of each wire around the wooden end of a small foam brush three times. If you curl it more times than that there will not be enough room between your pieces for the embellishments. Place the wire thru one end of a banner piece then the adjoining end of the next banner piece. Curl the strait end of the wire around the end of the foam brush tree times. This will hold them in place. You can bend or stretch the wire to achieve the look you want. For the two ends thread the strait
end of the wire through the hole. Bend the end of the wire over and twist the wire together to form a loop to hang the banner from.
Adhere the vinyl to the banner pieces. I put texture cream over the top of mine to help them stay in place.
Cut ribbon to desired length. Tie the five small metal keys to the ribbon and tie all of the ribbons to the wire.
Embellish as desired. I glued the small wood heart to the I banner piece. I used black sprinkles and rhinestones to add interest.
Tutorial By Michelle Harrington