Seasonal Slat Sign
Halloween, Thanksgiving and Christmas!
That is right...same sign to decorate for three different holidays!
Supplies needed:
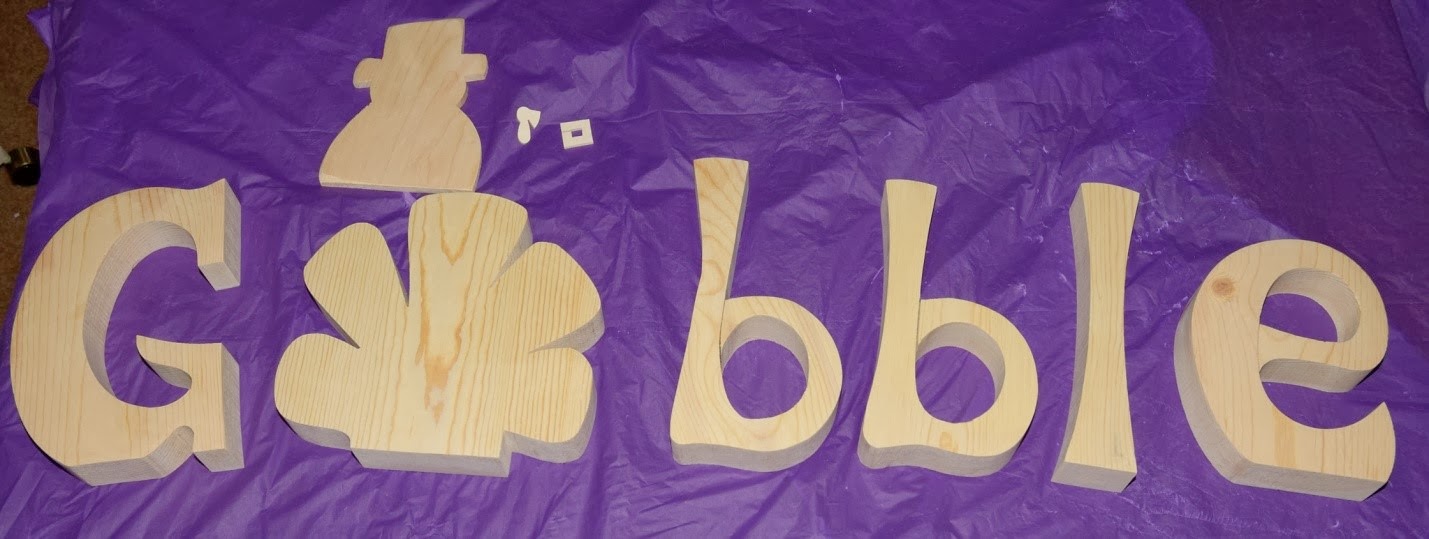
Slat Sign
Turkey Cut Out
Reindeer Cut Out
Delta Paint – Light Ivory, Burnt Umber & Barn Red
(These are the colors I used. All could be replaced to match any home décor or
theme)
Paper
Chevron Vinyl
Foam Brushes
Wood Glue
Ribbon
Velcro
Texturizing Cream
Finish Spray
Pen
Sandpaper
Lets get started.
Paint Slat sign the color you want your
Chevron stripes to be. I used Light Ivory. Make sure to get this color into the
gaps. Set aside and let dry.
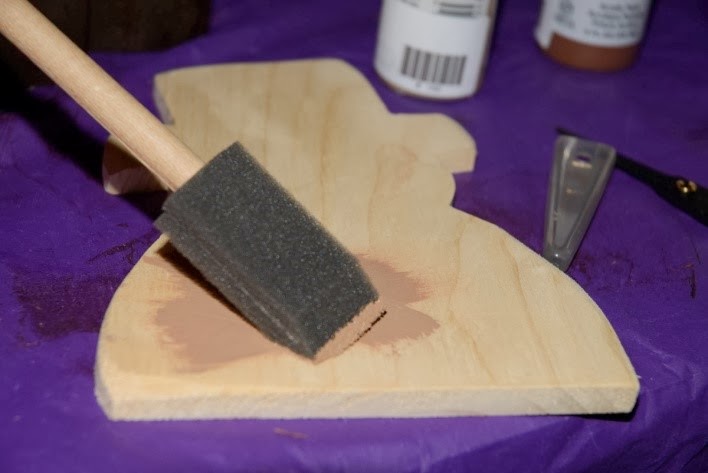
Trace the turkey on the paper. Trace on the side of the
paper that will not be shown. Cut our turkey silhouette and set aside. Paint
the sides and back of the turkey your desired color. I used the light ivory. Set aside and allow time to dry.
Don’t paint
where you are going to be gluing on the paper. The paper will stick better if
it is directly on the wood. Once the turkey is dry take the wood glue and
spread it evenly on the turkey and apply the paper. Allow time to dry and sand
off any paper that hangs over the edge of the wood.
You can use the Texturizing Cream to seal the paper. I
love the finished look the Texturizing Cream gives your project.
If you want to you can tie a little ribbon around the turkey.
After the slat sign has had time to dry now apply the
Chevron Vinyl.
(You don't have to use the chevron vinyl. You could also just paint the slat sign a solid color or choose two colors and alternate them on the slats)
Once the vinyl is on, paint the slat sign again and make sure you
paint the sides of the sign as well. Don’t paint between the slats. I used
Burnt Umber.
When the second coat of paint is on, and, dry remove the
vinyl. You may have some touch up to do but shouldn’t be much. I touched mine
up so that the lines were nice and crisp.
Now take your Velcro and place a piece or two to the
center of the slat sign and the turkey. Now you can stick your turkey to the
slat sign.


So the great thing about this Slat Sign and attaching the
turkey with Velcro is that now you can change it for each season.
I created my reindeer right along with my turkey.
Paint the reindeer. Paint the front, back and sides. I
used Barn Red.
Once the paint has dried now apply wood glue and spread
it evenly on the reindeer. Grab your glitter and sprinkle it all over your reindeer.
Now pick up your reindeer and tap off extra glitter and funnel the extra
glitter back into its jar.
Now take the finishing spray and apply it to the reindeer
to help seal and keep the glitter on. Once it has had time to dry apply the Velcro
to the back and now it is ready to be put on your slat sign after Thanksgiving
is over.
There is also a Pumpkin Cut Out that you can make to use
during the Halloween season as well.
I really loved how this turned out and love that I can
change it for each different season.
This project was fairly easy and didn't take long from start to finish!